
January 26, 2017
By: Chett Norton, C.E.T and Stephanie Jouppien
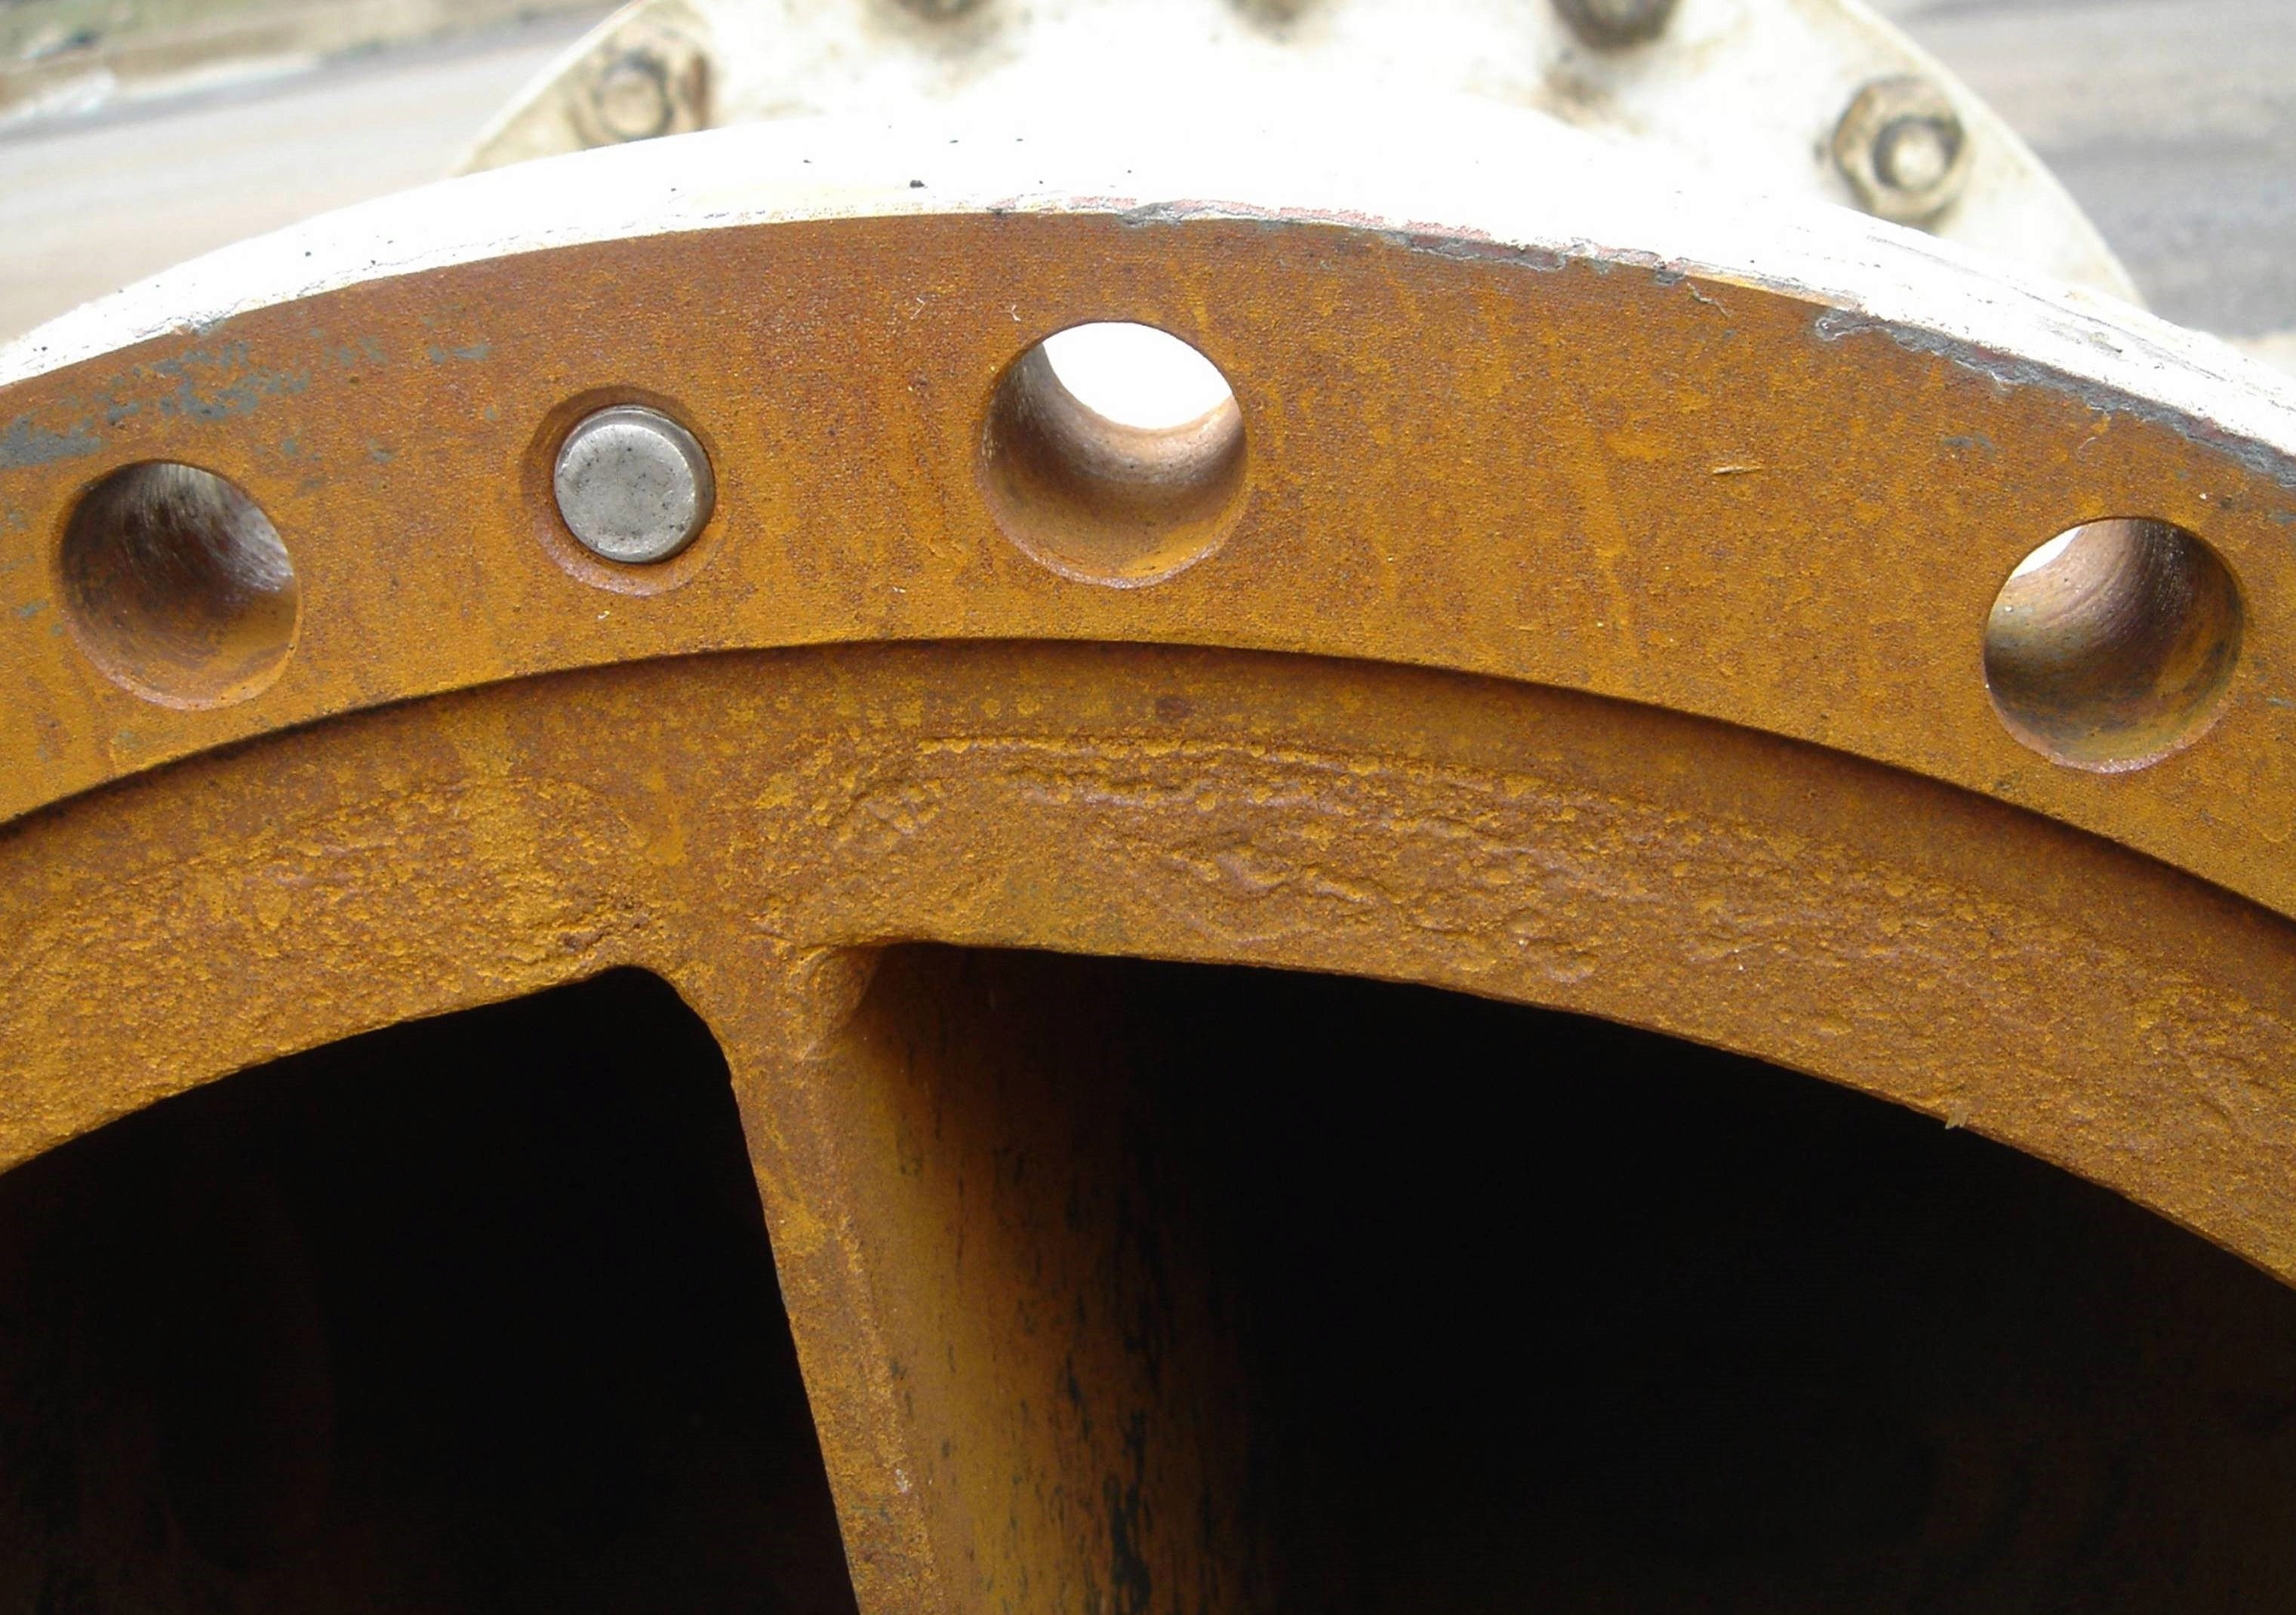
Figure 1: Pitted flange with steam cuts. Photo courtesy of Slade Inc.
Imperfections on flange faces happen. With regular maintenance and removing old, stuck-on gasket\debris, flanges with scratches, pits, dents and dings are a common site in many a plant. With more and more companies adopting low emissions business practices, can damaged flange surfaces seal to meet environmental compliance?
In the fluid sealing world, we know that flange surface is directly related to sealability and sealability is directly related to environmental compliance. As 85% of all known flange gasket failures are installation related, installers must take extra care when sealing damaged flange faces. Acknowledging the importance of proper gasket installation, we’ve compiled a list of 10 steps and considerations for diagnosing and overcoming flange damage.
10 Steps to Sealing Damaged Flange Surfaces
-
- 1. Get an updated copy of ASME PCC-1
ASME PCC-1 is unarguably the post-construction code bible of bolted flange joint assemblies (BFJA) in North America and following their published guidelines is best practice for bolting assembly procedures. A big benefit in using PCC-1 when sealing damaged flange faces is that it addresses the issue of working with imperfect flange faces and determines permissible amounts of damage that can still work as part of a BFJA and maintain an effective seal. Keep an eye out for updated versions of PCC-1 as fugitive emissions regulations become stricter.
- 1. Get an updated copy of ASME PCC-1
- 2. Understand how a gasket & flange work together as part of a BFJA
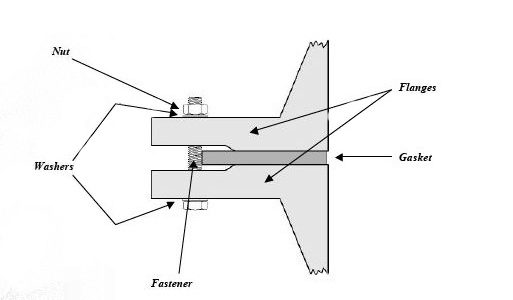
Figure 2: Bolted Joint Flange Assembly. Photo: Guidelines for Safe Seal Usage, Flanges and Gaskets. ESA/FSA Publication No. 009/98
The gasket is meant to create and maintain a static seal between two stationary, imperfect surfaces, containing a variety of liquids or gases under various service conditions. The surfaces or flanges must significantly compress the gasket to ensure a tight seal that has uniform pressure across it, despite any physical damage, like pits or dents. Mating flanges connected by a sealing device have serrations (roughness) on the faces that are meant to “bite” into the gasket material, effectively holding the gasket in place as it is compressed between the two flanges. As the compression happens, forces try to push the gasket material outwards. By holding the gasket in place, the installer is able to compress the seal and achieve desired tightness. The hole in the centre of the ring gasket will compress inwards slightly but remain open to allow media to pass through the pipe.
- 3. Take apart flange and assess for damage
When replacing gasket material in a BFJA or performing maintenance, pay attention to the flange face. Note any visual defects or damage – marks, scratches, dings or anything that changes the serrations on the flange face that can affect the flange’s ability to “bite” into gasket material. If so, reference PCC-1 for the maximum allowable defect depth and determine if the flange is suitable for service.
- 4. Identify a compressible gasket material that can fill imperfections
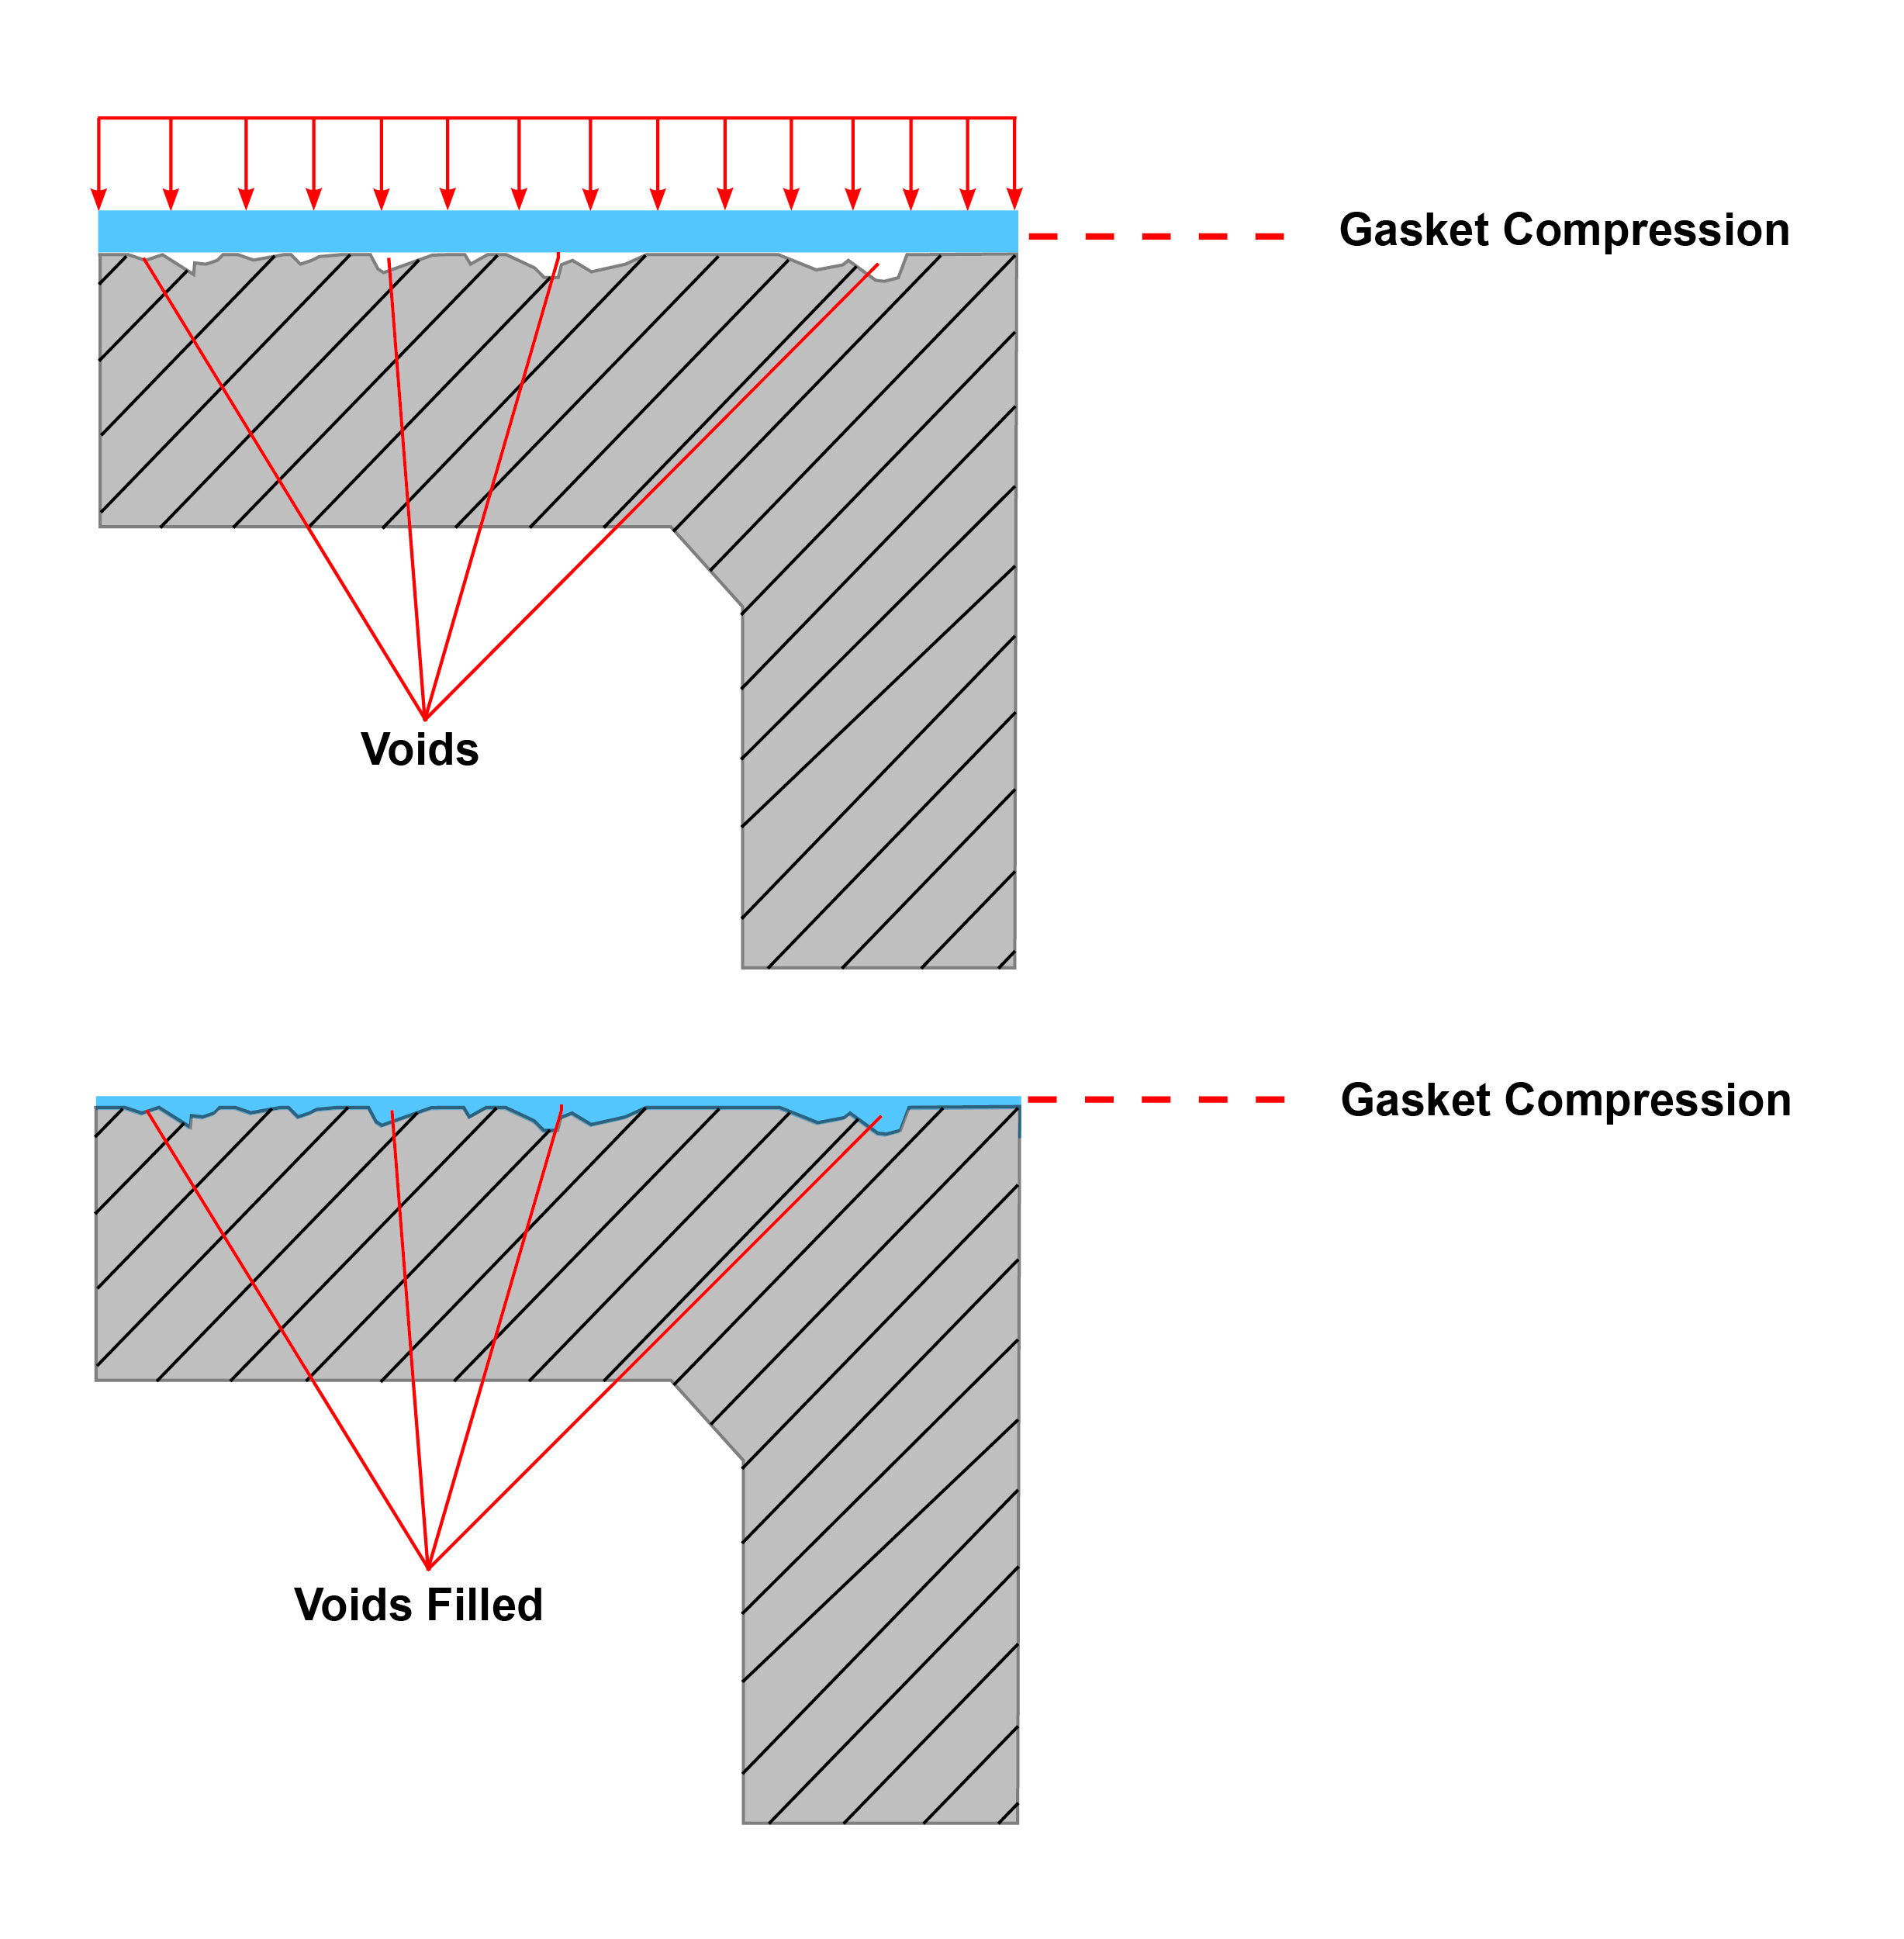
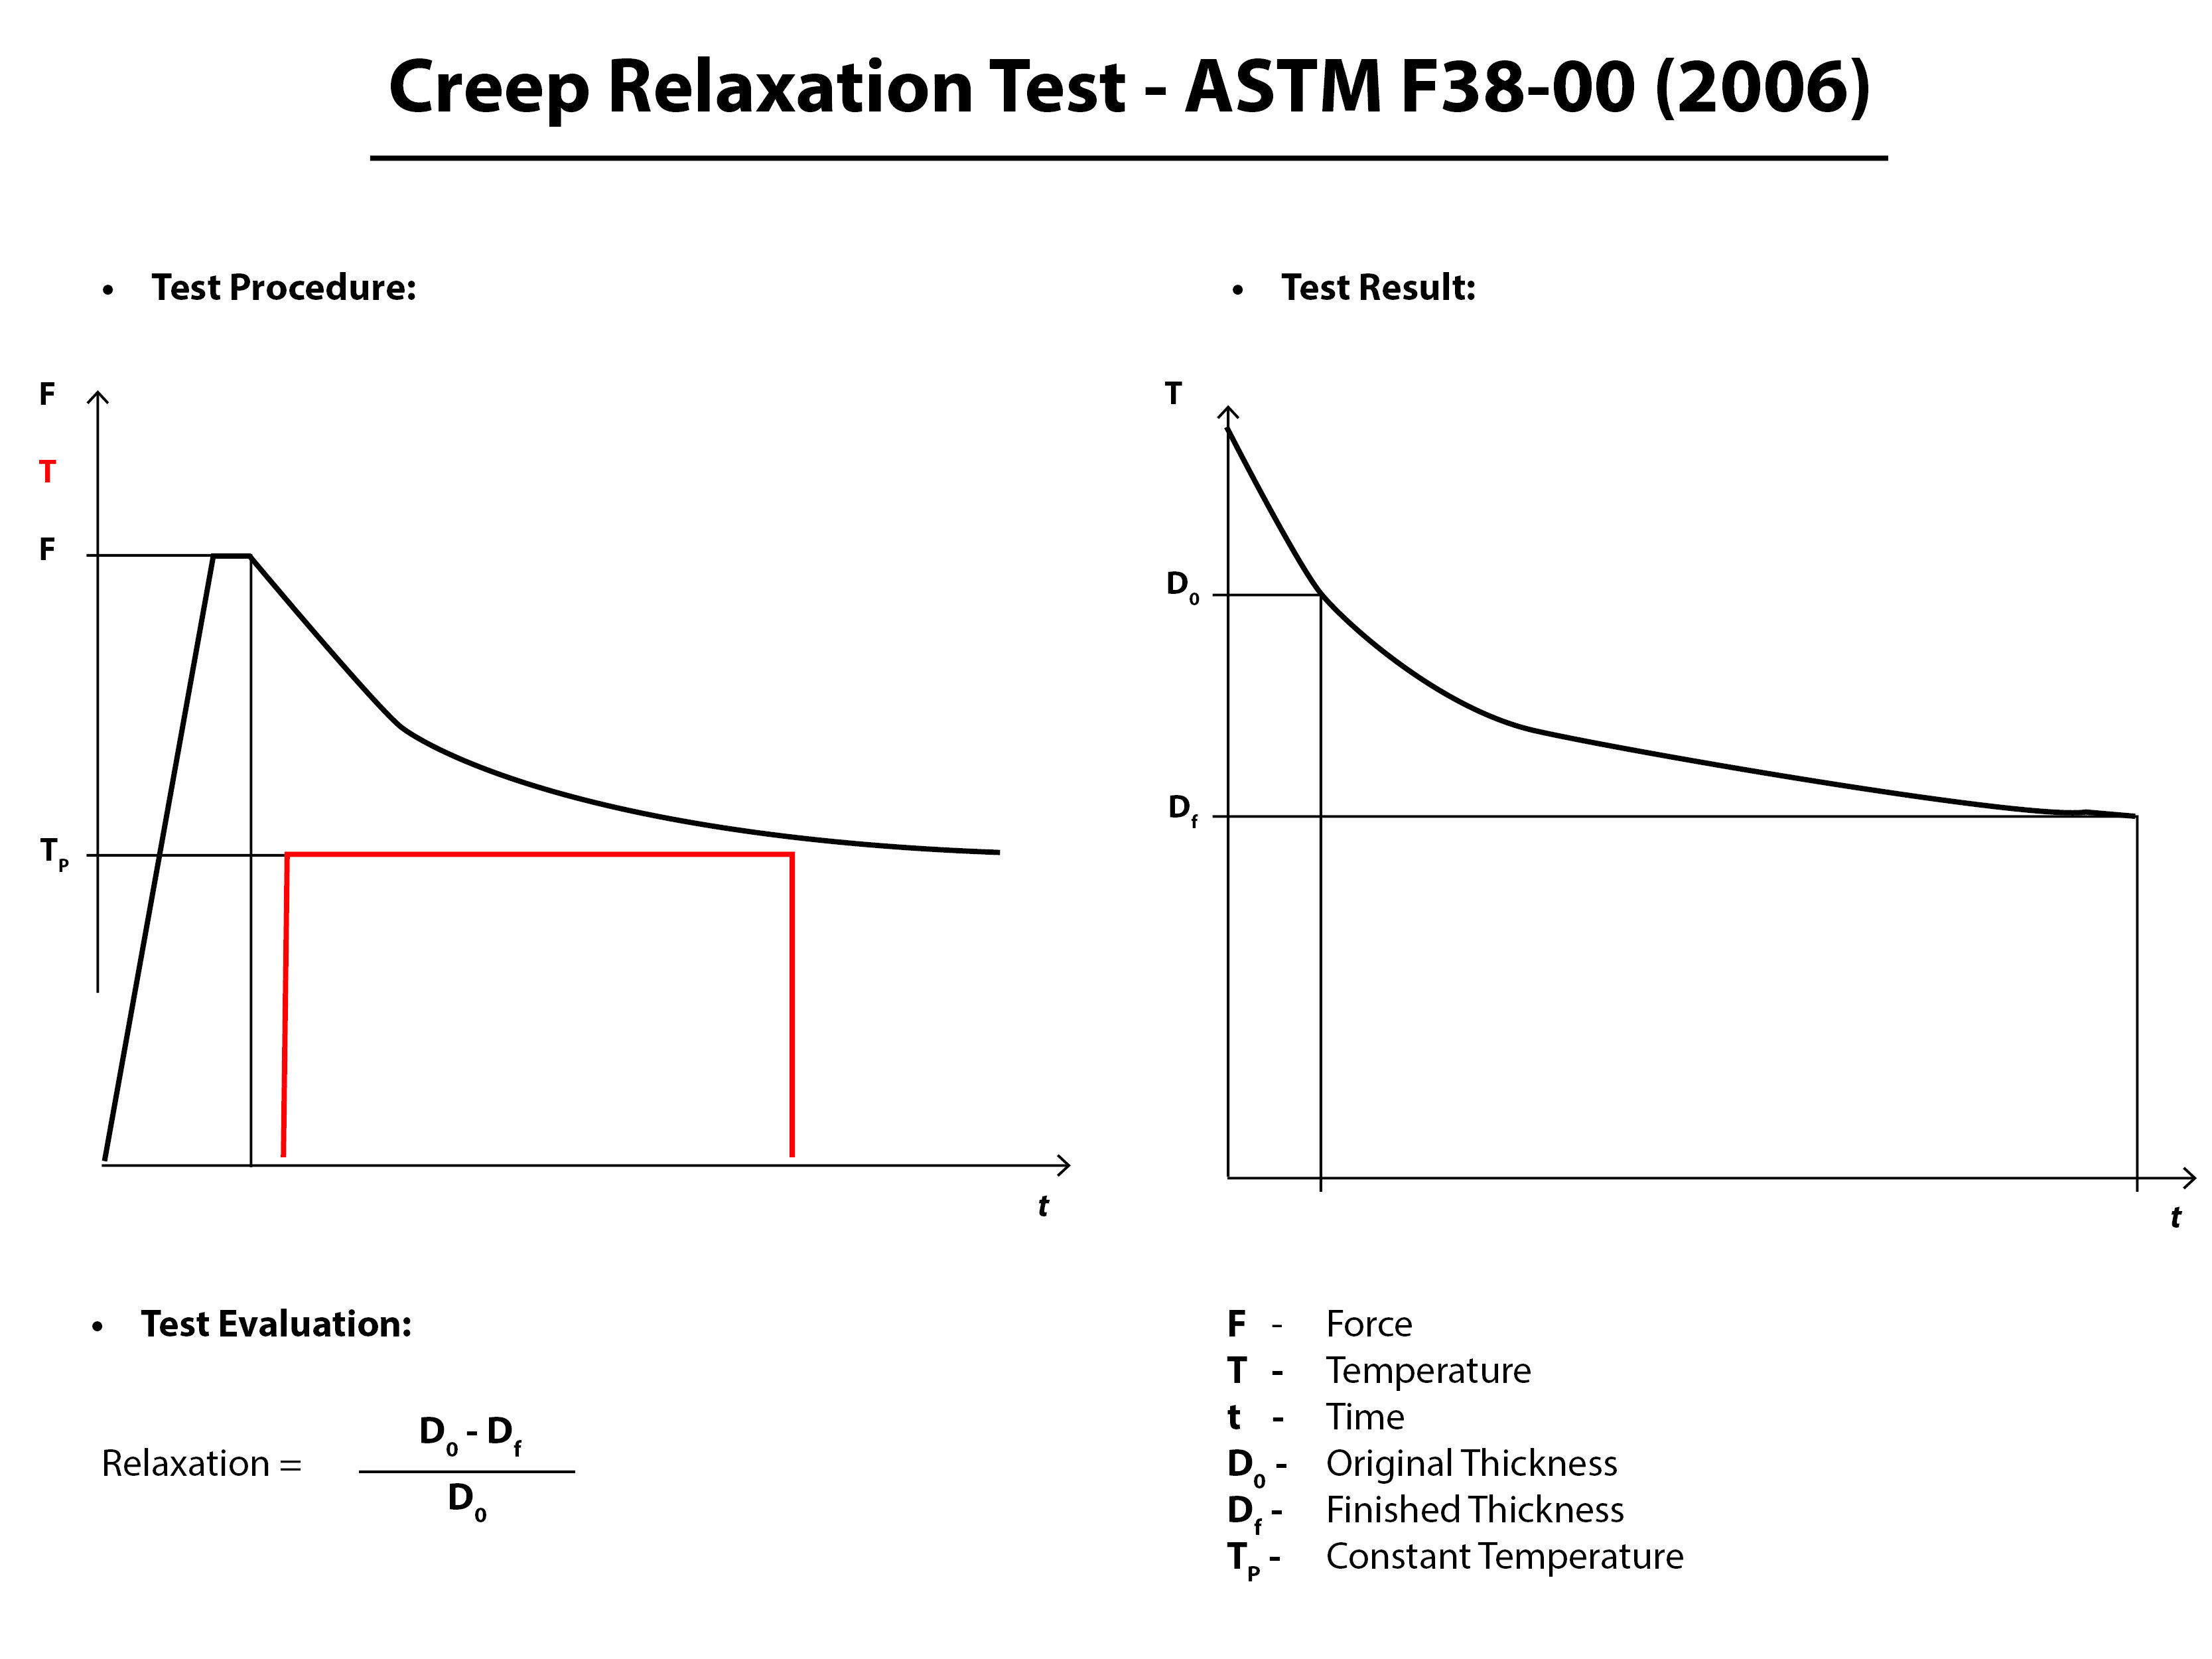
There is a high probability that damaged flanges could be a factor in BFJA failures. Warped and damaged flanges need to have imperfections filled by a compressible gasket material that can “bounce back” or recover with the flange and prevent leak paths from forming. Because this is widely known, installers believe installing a thicker gasket will solve the problem. However, what they do not take into account is that the thicker the gasket, the more creep will occur and paired with the inevitable decrease of force on the gasket, a gasket failure could result. The more that creep relaxation occurs, the higher the chance of a blowout.
When using smooth face finishes, such as those usually found in machinery or flanged joints other than pipe flanges, it is important to consider using a thinner gasket to lessen the effects of creep and cold flow. It should be noted, however, that both a thinner gasket and the smooth finish, in and of themselves, require a higher compressive force (i.e. bolt torque) to achieve the seal.
Durlon low emission gaskets for damaged flanges
Durlon PTFE –compressible gaskets with low creep properties suited to a wide range of service conditions and aggressive chemicals
Durlon ePTFE – highly compressible and versatile biaxially stretched PTFE product that conforms well in worn flanges and can handle a wide range of aggressive chemicals
Durlon ePTFE with metallic core – Durlon Durtec gaskets are virtually uncrushable under recommended loads and are an excellent low-emissions sealing gasket, paired with the conformability of ePTFE on both sides to suit imperfections on flange faces
Durlon SWGs (spiral wound gaskets) – winding density can be altered to allow conformability of SWGs
- 5. Determine correct thickness
A general rule of thumb for gasket thickness, is that if your flanges are in good condition and under 10” NPS the industry standard is to use 1/16” thickness. For flange sizes 10” NPS and larger the recommended thickness is 1/8”. If a previously installed PTFE gasket is removed and the serrations of the flange protrude through the material, this indicates that perhaps the gasket material being used is too thin and a thicker material should be used. In most industrial sealing applications, 1/32” is the minimum thickness that should be used, depending on the roughness or extent of damage on the flange face.
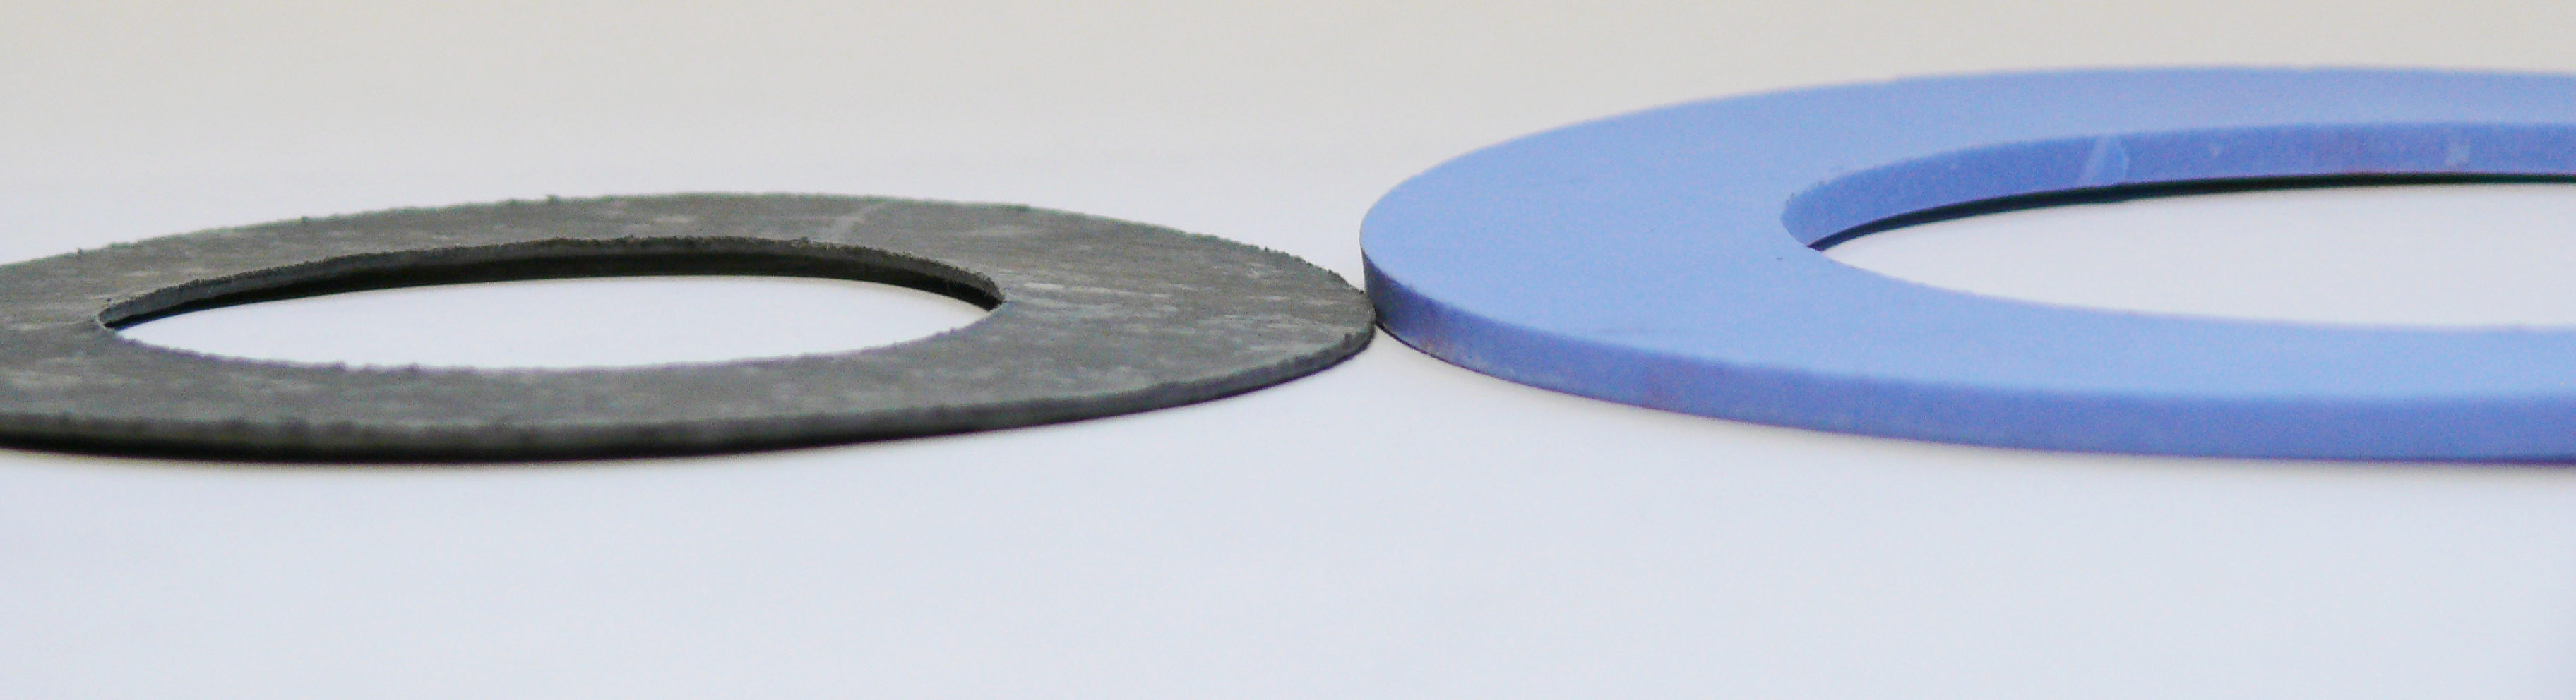
Figure 3: Gasket thicknesses; Left – 1/16″; Right – 1/8″
Note: Regardless of thickness, all of the other standard gasket qualifications must be met including bolt load, chemical resistance, working temperature/pressure ranges, material recovery, systematic thermal cycling, etc.
- 6. Take extra time installing & use proper torque values
It’s best to take a little extra time when installing a gasket between damaged flanges as improper installation causes approximately 85% of flange gasket failures and can greatly impact plant safety and piping structural integrity. If a single void is left unfilled, the gasket buckles or pinches, a leak path will be created. Be sure the reference the correct torque values by flange size and gasket style/class. Torque values are made readily available by the gasket manufacturer; Durlon torque values can be found on pages 49-53 of the Durlon Gasket Manual.
- 7. Add extra passes to bolting “star pattern” in assembly procedure
As an installer begins incremental tightening with the standard “star pattern” bolting assembly, additional passes will ensure the gasket is flat against the flange face. Concentration points forming over pits and marks will increase stress in those areas and possibly crush the gasket in certain places. Extra passes are especially important on worn flanges when serrations don’t “bite” into the gasket and hold it in place. Download a printable Bolt Tightening Worksheet here.
- 8. Re-torque
The gasket will inevitably relax, with the majority of creep-relaxation happening between 4-20 hours after the initial installation and must be re-torqued. This is a step that is frequently missed in many day-to-day gasket installations, in part because downtime is not an option for many. An even bigger issue, is when those installers fire up a system right away and re-tighten when the system is hot. This is known as hot-torquing and is not recommended. When a soft gasket material, such as compressed non-asbestos is hot-torqued, the material can crack as it becomes brittle when elastomer based material comes into contact with elevated temperatures.
- 9. Keep a record of damaged flanges and record leak rates
Keep a detailed record of which flanges in your systems are damaged, so that the same installation procedure can be used.
- 10. Replace gaskets or flanges when necessary
In many cases, an imperfect flange won’t be cut off and replaced, but when sealing with environmental compliance in mind, it is best to ensure that leaks are properly identified, recorded and dealt with. In some cases, this means replacing gaskets more frequently, especially if stress concentrators over dents/scratches are causing issues. It is best practice to not re-use gaskets unless direct application and user experience suggests it is safe to do so.
Main Takeaways
Slowing down and properly assembling a flange gasket connection can help companies meet environmental mandates by reducing emissions in BFJA’s. Be sure to properly assess physical flange damage on a flange surface and reference PCC-1. The imperfections seen may be well within the recommended guidelines for use by ASME. If you do have some damage to contend with, consider using a thicker, more compressible gasket material to fill imperfections, effectively preventing leak paths. Become familiar with proper bolt-up procedures and understand how much compression is needed if the switch is made to a thicker, softer material. Avoid firing up any systems immediately after installation and observe and record how the new BJFA performs compared to others.