
May 4, 2017
By: Chett Norton, C.E.T
Gasket installation seems like a simple concept:
You take a gasket, put it between two pipes, tighten the bolts and voilà…..it’s done.
Although this seems like a straightforward process, even to a seasoned veteran pipefitter, it can be tedious or downright scary if proper care is not taken during the installation process. To help with gasket installation, I have compiled a list of 6 of my favorite tools that will help even the most novice pipefitter install gaskets with ease. Before reading this list, you should already know how to install a gasket.
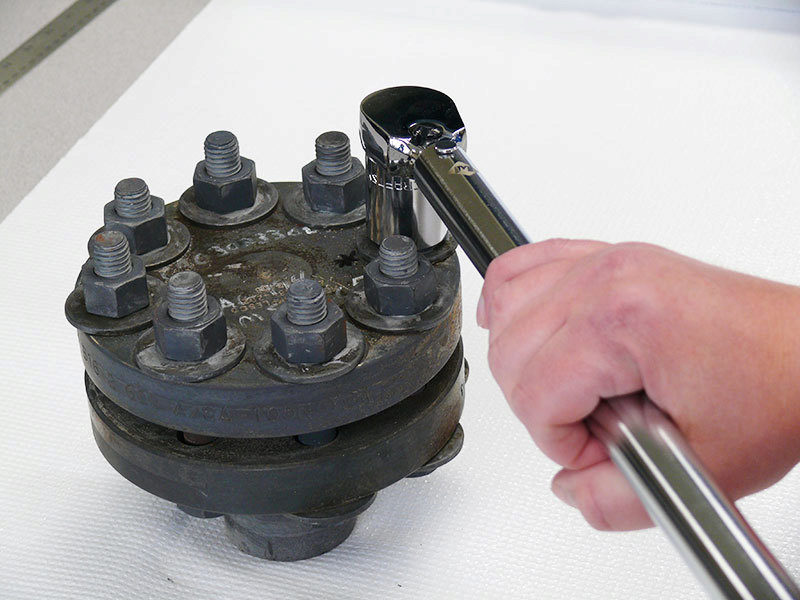
Torque Wrench
They can come in many shapes, sizes and styles ranging from the basic beam, clicker wrench or even electronic wrench. In 60% of gasket failures, the main cause of the failure is linked to under loaded gaskets. Applying the correct torque helps ensure that you are properly stretching the bolts, which in turn act like a spring pulling the flanges together, creating load on the gasket and achieving an effective seal. Torque wrenches can range in price and accuracy, however, despite the tool’s price tag, a torque wrench is only as good as it’s last calibration. So be sure to do this before putting it to use.
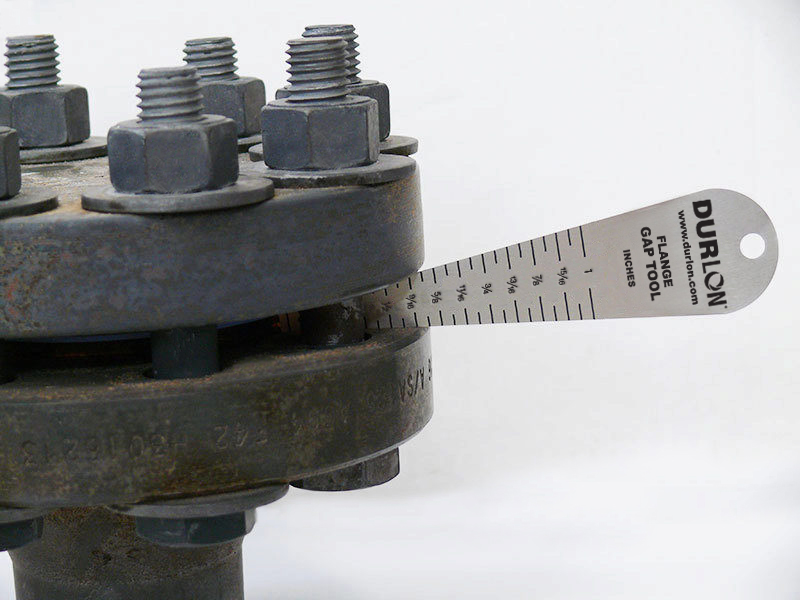
Gap Tools
These little dandies are very important in the gasket installation process. An important thing to remember is that bringing the flanges together in parallel ensures maximum contact between the flange and gasket. This transmits the most load that can be applied to the gasket, increasing the chance of success with your gasket installation. When you are tightening the bolts, it is important to measure the gap between the flanges, around the flange circumference in a minimum of 6 spots. If the gap is uneven, loosen or tighten the appropriate bolts until the gaps are within 1/32” (0.8mm). Once the flange gap spacing is evened out, you can continue with your cross star tightening pattern. The flange gap should be checked between every tightening round, paying special attention to first 2-3 passes.
Drift Pins
These hardened tapered steel pins aid in the alignment of flanges. Inserting a minimum of two drift pins into the flange bolt holes helps with two things: flange hole rotational alignment and centre line high/low alignment. After these pins have been inserted and the flanges are properly aligned, the bolts can be inserted with ease for future tightening.
Flange Spreader
Tight quarters or flanges that have very little spacing or clearance make it difficult to install a gasket and can increase installation time. Prying flanges apart with a bar or screwdriver is not a good idea, nor a safe one. Flange spreaders allow you to safely increase the gap between the flanges and give you enough room to remove the old gasket and insert a new one.
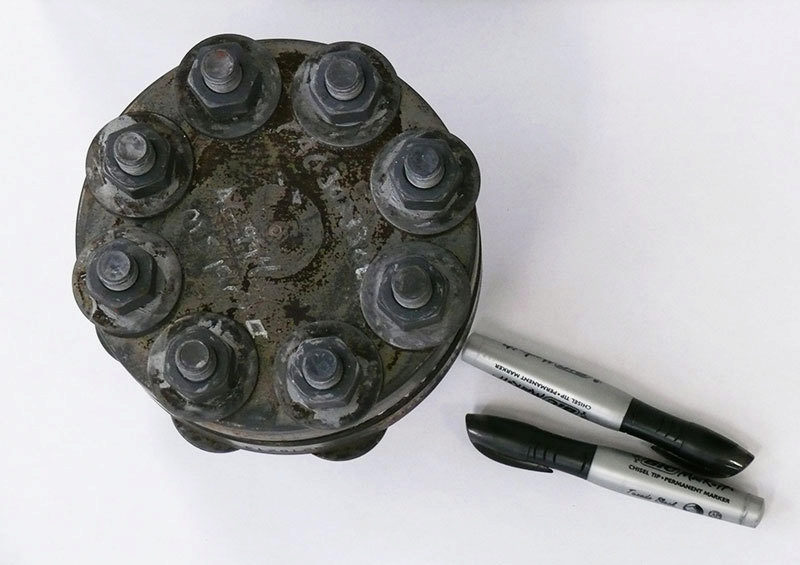
Sharpie
Perhaps one of the cheapest items on the list, but a useful one. A permanent marker such as a “Sharpie” allows you to number the bolts correctly so that you can follow a cross bolt tightening pattern during multiple rounds of tightening and not forget where you left off or which bolt is next.
This is not necessarily a physical tool, however, it can help a great deal with the installation procedure. This document gives the installer step-by-step instructions of the installation procedure in a check list format with the appropriate torque values for the installation. These sheets can also record the size, class, condition, bolting material, lubrication and installer. These installation details can be recalled at a later date and may help you will troubleshooting a problematic flange or a difficult sealing application based on previous installation history.
Hopefully you found my recommendations useful and have learned something new. If you haven’t tried any of the tools I mentioned, give them a try to compare things like ease of installation, tool usability, and installation time. Until next time, work safe, work smart and most importantly……keep the fluid between the pipes! If you would like more detailed information related to gasket installation, contact us.